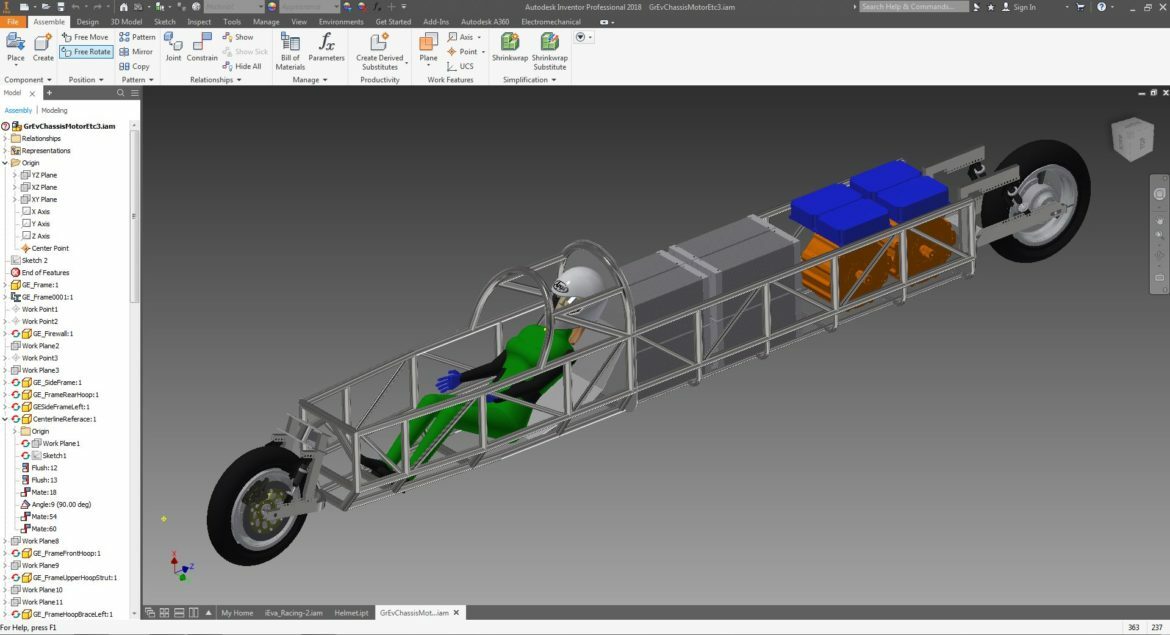
The design work for the Green Envy is moving along! Here is the first glimpse of it, and it is starting to look like a streamliner (note that the sidecar wheel is not yet added, Green Envy will be a sidecar motorcycle just like KillaJoule).
I really wanted to include myself in the CAD (Computer Aided Design) model of the Green Envy, and I had planned to CAD myself. Thankfully Bill and I did a quick googling and saved myself at least two days of work – meet iMandy! You can download iMandy (and her partner iMan) from http://www.apollocanard.com/7_downloads.htm. Perhaps the model is a bit cheesy, but my home-brewed version would have been no better. Dressed up with a racing suit and a helmet she is more than good enough for an early rendering.
What different with Green Envy?
The “engine bay” will be about 3 ft (1 m) longer than in the KillaJoule to hold the 1000+ HP drivetrain. It will also be about 2 inches (50 mm) taller to allow for more vertical head clearance, which has been shown by FIA to drastically improve safety. One of many little things we wanted to fix for a long time.Although Green Envy will be a sidecar motorcycle just like KillaJoule, I have chosen to follow stricter recommendations for safety than the FIM rules. I don’t want to make racing a once-in-a-lifetime experience, I want to come back and do it again, even if I accidentally throw my toy on the ground at 400 mph…
Autodesk Inventor Frame Generator – the best thing since sliced bread!
My CAD software of choice is Autodesk Inventor Professional. I kind of “inherited” this love of Inventor from Bill, who used it for many years. Bill in turn chose Inventor because the machine shop manager at his job (NOAA, National Oceanic and Atmopsheric Administration) used Inventor, and he wanted to be in the same system. While it is kind of happen-stands that I ended up being an Inventor lover, I do indeed really like this software.
Bill and I have recently learned to use a very nifty feature in Inventor which is making the design of Green Envy so much easier: “The Frame Generator”. It was the University of Auckland central shop manager Steve Warrington that told me about it. You draw a wireframe with simple lines where you want the tubes in your frame. Then you simply tell the program the cross-sectional dimensions of your tube (inner and outer diameter) and material, and point to the lines where you want tubes to be created. You use different diameter tubes for different segments. With a click of a button, it will notch the tubes at the intersections. I have yet to find out how easy it will be to print drawings, cut lists, and to do the actual notching. However, no matter what, it has already saved us a lot of work.

With my busy schedule, I have to delegate some of the CAD work to Bill.


